
The peacock is beginning to grow his traditional tail feathers at 15 1/2 months of age.


I have found the best way to clean the chicken coop is to use a screen constructed of a frame of 2X4s with 1/4 inch hardware cloth. I first rake the poop in a pile and then shovel it onto the screen. The sand falls through and the
poop stays on the screen
which I dump into a wheel borrow and use in my compost pile.
I constructed the chickens feed box with wood. The top is at a steep slant so they will not sit on the top and poop all over it. I put hinges on the top so I could easily put the feed in and the opening in front is just large enough for the roosters comb to fit . I have been very happy with this design.
We had to put a top over the end nest because when the hens would roost on the top of the nesting boxes at night they would poop into that far right open box. It is now very private and roomy!
Underneath the nesting boxes I have an old cat litter container with large holes cut in the sides for water, old gallon containers with holes cut in the sides for oyster shells (for calcium) and grit (this helps them to digest whole grains) and the layer mash box I built. I do have them raised up so they keep a lot cleaner.
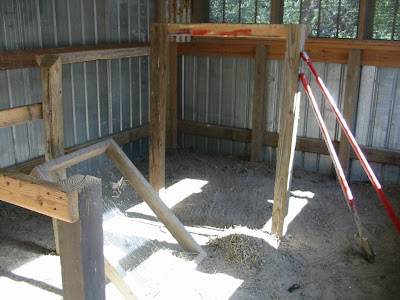
I am trying cedar flakes as the bedding for the floor, I know I cannot sift the poop out but when we went to get the cedar saw dust, this was all they had, we will see what works. It sure smells a lot better!
Two of the Aracana chickens disappeared last week. We know it was not during the night. The only thing we can think of is a fox or chicken hawk got them as they wandered off by themselves. We are beginning to believe that the Aracana's have a mind of their own and are very suborn at times, like not coming
with the others at night when we call for they to return to the coop. Maybe they are getting deaf!
Richard is improving the pigeon coop by redoing the nesting boxes so they have a plywood bottom attached to a 2X4 that is a perch and that slides out for easy cleaning.
It is important to have a place that each pair can roost together and not be bothered by other jealous males.
We oriented the coop east/ west so the sun would come in in the winter to keep them warm and not come in in the summer so they would be cooler, so far this has worked very well. This building was built from recycled materials as well.
The best book to read about pigeon care is "the Pigeon " By Wendell Levi. He was/is the foremost authority of pigeons and has written the most complete information which has been the standard for the past 40 years!
These are the babies and will be the ones that will be trained to fly from a distance because they were born in this coop.
The parents will always be captive , for if they were let out , they would fly to where they were born.

Here is the example of the before and after nesting box upgrade.
A Cut ant update: I could never quite get rid of all the colonies with the soap and it was taking me hours of search , mix and pours in the dark. So I have come across a powerful chemical that we are using to get rid of the termites call "Termidor"(Fipronil) It is actually low on the list for toxicity, here is a link to the information:
http://npic.orst.edu/factsheets/fiptech.pdf THIS really works! The way I use it is very conservative. I mix 1/2 teaspoon into 2 cups and pour about 2Tablespoons into the hole of each and hill, that way no other animal will be affected. The way it works is that the ants do not detect its presents and continue on as normal. They spread the chemical from one ant to another and the whole colony is infected by the time the chemical starts affecting their nervous system and by then it is too late. The cheapest place I found to order Termidor is
www.domyownpestcontrol.com . They were very prompt as well. I will keep you posted...
This is the sad part. We built an 8 ft fence so the dear would stay out and would not even try to jump the fence. For some reason this dear jumped through the 8" opening ,she made it through except for the last hoof which got caught between the wires. It is hard to witness this happening when we thought we were preventing it . We have seen this happen with a 4'foot fence, but NEVER thought this would happen with a much taller fence.


